To integrate the form into your website, enable the “Embed with HTML” feature. An embed code will appear in the field below. This code is unique to the specific event and will automatically update if any changes are made after the form has been embedded. This ensures that visitors remain on your website while also allowing you to track page visits and clicks.
To implement this, you need access to add a new page to your website with custom HTML. On most platforms, this can be done through the website’s publishing tool, while in some cases, the HTML code must be inserted directly into the site’s templates.

Tip! If you have several events and want to display them all on your website, you can use our calendar feature. Read more about the calendar feature here.
Remember to click “save and publish” when you’re ready to publish your event.
Styling codes to customize the form appearance
If you want a different look than the default style of the form embedded from Checkin, you can make changes using coding. Here, we’ve highlighted some of the most common styling codes for customizing the form.
Each website platform is structured differently. To insert the embed code, you will most likely need to access the section where you normally edit your website. Look for options such as “Form,” “Embed,” “HTML,” etc. Once you’ve pasted the Checkin form and confirmed that it works, you can return to apply the styling codes.
Note: Before your code, use <style>, and after your code, use </style>, as shown for each snippet. If you are using multiple codes in sequence, you do not need to add <style> and </style> between them.
Make the background transparent
To make the background transparent instead of white, paste the following code:
<style>

/* Makes body transparent */

#checkin_registration .registration--body,
#checkin_registration .registration--start>.ticket>div,
#checkin_registration .registration--start>.ticket>div:last-child,
#checkin_registration {
  background-color: transparent !important;
}

</style>
Change the color of text and titles
Paste the code and replace the current #000 with your desired color code.
<style>

/* Style registration form text */

#checkin_registration p, #checkin_registration h1,
#checkin_registration h2, #checkin_registration h3,
#checkin_registration h4, #checkin_registration div {
  color: #000 !important;
}

</style>
Change cutton colors
To change the color of buttons, use the following codes (different code for different buttons).
Note that in the code, “color” refers to the text, and “background” refers to the button background.
Change the color of the “Continue” button:
Paste the code and replace the current #000 with your desired color code.

<style>

/* Primary button color */

#checkin_registration button.btn-success {
  color: #000 !important;
  background: #000 !important;

}

</style>
Change the color of selection buttons for payment type
Paste the code and replace the current #000 with your desired color code.
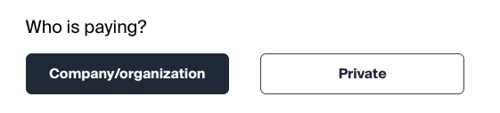
<style>

/* Option button color */

#checkin_registration button.btn--active {
  color: #000 !important;
  background: #000 !important;
}

</style>
Change the color of the “Book and fill out” / “Book now, fill out later” button
Paste the code and replace the current #000 with your desired color code.

<style>

/* Mode “Book tickets”, “Book unspecified tickets” */

button[name="activeMode"] {
  color: #000 !important;
  background: #000 !important;
}

</style>
Change the color of the “+” button
Paste the code and replace the current #000 with your desired color code.
<style>

/* Plus button */

#checkin_registration .ticket--amount--button.plus {
  color: #000 !important;
  background: #000 !important;

}

</style>
Change the color of the “-” button
Paste the code and replace the current #000 with your desired color code.

<style>

/* Minus button */

#checkin_registration .ticket--amount--button.minus {
  color: #000 !important;
  background: #000 !important;
}

</style>
Change the color of the text field for ticket quantity
Paste the code and replace the current #000 and #fff with your desired colors. You can also use hex codes to define the colors.
With this code, you can, for example, change the background color of the box and set a lighter color for the number.

<style>

/* Ticket quantity input */

#checkin_registration .ticket-number-input,
.checkin_registration .ticket-number-input {
  background-color: #000 !important;
  color: #fff !important;
}

</style>
Change fonts
All text in the embedded form will adapt to and inherit the font already used on your website. If you want to change the font of the registration form, you can use this code and replace [font-name] with one of your preferred font types:
#checkin_registration h1, #checkin_registration h2,
#checkin_registration h3, #checkin_registration h4,
#checkin_registration h5, #checkin_registration h6,
.checkin_registration h1, .checkin_registration h2,
.checkin_registration h3, .checkin_registration h4,
.checkin_registration h5, .checkin_registration h6
Paste the full code below and replace <font-name> with the font of your choice.
<style>

/* Change font family */

#checkin_registration h1, #checkin_registration h2,
#checkin_registration h3, #checkin_registration h4,
#checkin_registration h5, #checkin_registration h6,
.checkin_registration h1, .checkin_registration h2,
.checkin_registration h3, .checkin_registration h4,
.checkin_registration h5, .checkin_registration h6 {
    font-family: [font-name] sans-serif !important;
}

</style>
Change text "Choose tickets"
Paste the code and replace the current text "Choose tickets" with your desired text.

<style>

/* Replace “Choose tickets” heading */

#choose-tickets span {
  display: none;
}
#choose-tickets::after {
  content: "choose tickets"
}

</style>
Change text “Order contact”
Paste the code and replace the current text "Order contact" with your desired text.
This can also be changed to the default options "Ticket Buyer" or "Parent/Guardian" under Form builder → Order field.

<style>

/* Replace “Order contact” heading */

#ticket-buyer span {
  display: none;
}
#ticket-buyer::after {
  content: "Order contact"
}

</style>
Change text “Participant”
Paste the code and replace the current text "Participant" with your desired text.

<style>

/* Replace “Choose tickets” heading */

#ticket-details span {

  display: none;

}
#ticket-details::after {

  content: "Participant"

}

</style>
Change text “Ticket addons”
Paste the code and replace the current text "tilleggsvalg for billetten" with your desired text.
![]()
<style>

/* Replace “Ticket addons” heading */

#ticket_addons span {
  display: none;
}
#ticket_additional::after {
  content: "Ticket addons";
}

</style>
Change Text Size
To change the text size in the form, paste the following code and replace the current "18px;" with your desired size. You can also select the type of text from the options below.
<style>

/* Change font size */

#checkin_registration h2 {
 font-size: 18px;
}

</style>
Different text types can be changed in the same way as text size. Use the same code as above and replace "h2" with the desired element:
#checkin_registration h2
#checkin_registration h3
#checkin_registration h4
#checkin_registration p
Note: Checkin has only one requirement for the page you are publishing on: it must be a secure page, https://. If your site only uses http, you will need to purchase an SSL certificate through your platform. You can also visit https://letsencrypt.org/ for a free SSL certificate. If you encounter other issues with your platform, they may be related to settings and/or permissions. In that case, please contact your provider.
Checkin is not responsible for any design-related issues that may arise from using the embed code. We recommend that someone with web expertise handles the implementation of the embed code.
Help articles from various publishing tools
Wordpress
https://wordpress.org/support/article/custom-html/
Squarespace
https://support.squarespace.com/hc/en-us/articles/206543167-Code-blocks
Joomla
https://docs.joomla.org/Help310:Extensions_Module_Manager_Custom_HTML
Drupal
https://www.drupal.org/docs/user_guide/en/block-create-custom.html
Wix
https://support.wix.com/en/article/wix-editor-embedding-a-site-or-a-widget
Problems Loading the Embedded Form
If the registration form does not load on your website, this may be due to the site having a Content Security Policy (CSP) that blocks the embed files. You can confirm if this is the cause by checking for error messages in your browser’s console.
To allow Checkin’s embedded form, a developer can add the following to the website’s Content Security Policy:
connect-src 'self' wss://*.checkin.no *.checkin.no;
img-src 'self' *.checkin.no data:;
script-src 'self' *.checkin.no;