Note: You do not need to download a driver if you are using a MacBook. Remember to use the Google Chrome browser!
Follow each step to download and install the driver for the printer.
- Connect the printer via USB and turn it on.
- Download and open the program that helps you find the correct driver.
You can find the link to the program by going to Zadig’s homepage.
Under “Download,” click on “Zadig 2.8.” If a pop-up window appears, close it.
- Click the dropdown list that displays all connected devices. In this case, you should select the printer you have connected. It will appear with the name: “ql-820nwb (interface 0)”. If it is not in the list, you can click “Options” and then “List all devices.” It will then appear in the list. Remember that the printer must be connected and turned on.
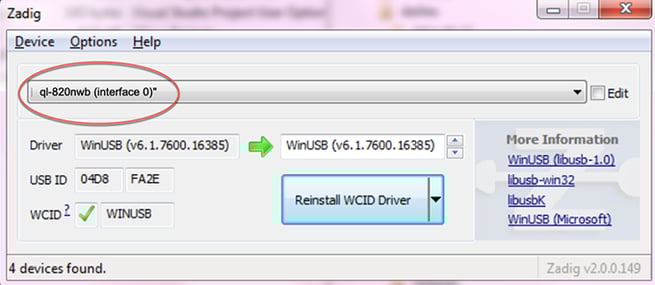
- When you have selected the printer from the list, you can click the button labeled “Install driver” or “Replace driver.” The driver is now correctly installed.
- Turn the printer off and on again to activate the change.
- Go to the scanner via “My page” in Checkin for the event where you will be scanning tickets.
- In the bottom right corner, you will see a small printer icon. Click on it.
- You will now see the printer as an available device. Select it and click “connect.”
- You are now ready to register tickets and print name badges. If you want to modify the name badges, you can click “Name badges” in the scanner and change the preferences for what should be printed. If you don’t select anything, the default will be Name, Company, and Job Title.
- If it still doesn’t work, you need to check that “interface 0” is connected, not “interface 1” See step 3.