In this step, you will be able to create ticket(s) for your event. You can add multiple tickets with different settings as needed. If you have chosen a paid event, you must start by creating a ticket with a price.
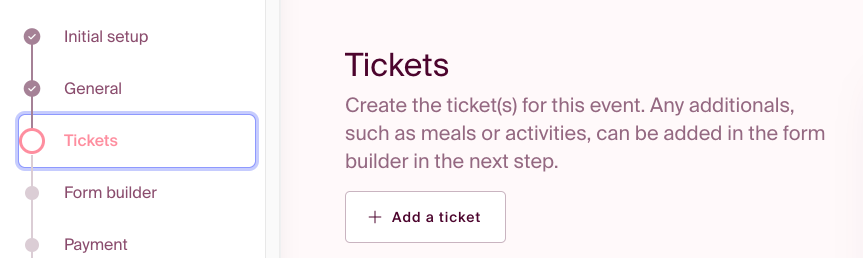
Click "Add Ticket."
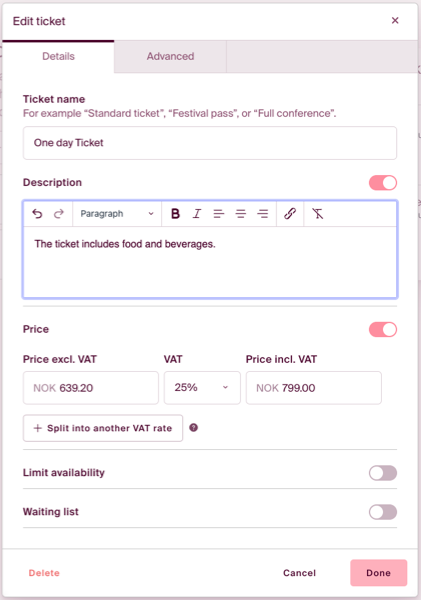
In the "Details" tab, you can enter the ticket name and ticket price. Remember to include the correct VAT rate if your organization is VAT registered. You can also divide the main price into several components with different VAT rates (also known as bundling). However, the customer will be presented with only one price. You can also add specifications (invoice descriptions) for each VAT rate.
Read more about how bundling works and its implications in our economy articles.
You also have the option to limit the availability of the number of tickets to be sold and whether you want to enable a waiting list if there are space restrictions. If you set a limit or a waiting list on the ticket level, please note that it will only be applied to that specific ticket, not across all tickets.
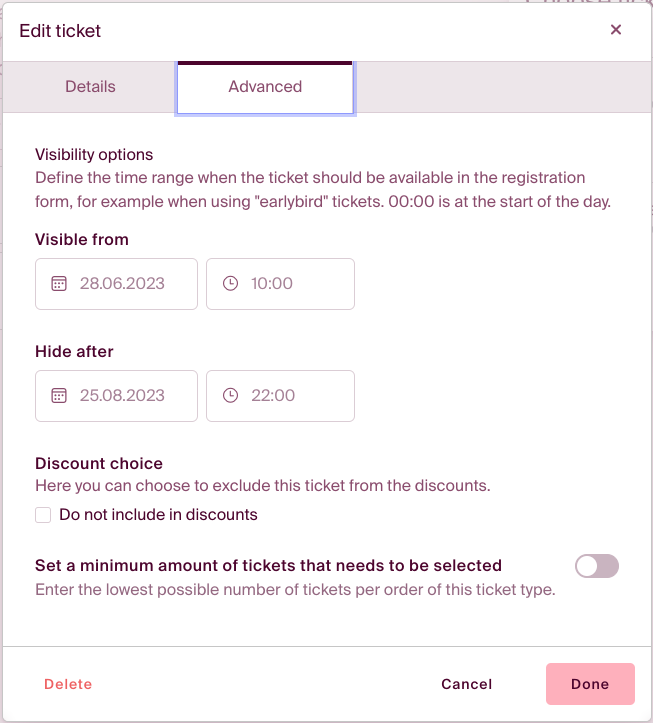
In the "Advanced" tab, you can set visibility periods for the ticket, apply discounts, and set a minimum number of tickets that the purchaser must select.
Click "Done" to create the ticket.
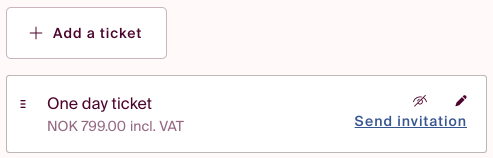
On the right side, you can preview how the registration form will appear to ticket buyers. Click on the pencil icon to edit the ticket and the eye icon to hide the ticket.
By hiding the ticket, it will be invisible in the form when other tickets are published. You can send an invitation to register for this ticket to selected participants via email. This can be useful for early bird ticket sales, inviting specific guests, or hiding ticket types that are sold out. You can also schedule in advance when the ticket will be visible under the "Advanced" tab, within each ticket.
Discounts for all tickets are entered under "Discounts" in the tools, in the lower part of the left hand menu.
Example of how to hide a ticket:
By clicking on the open-eye icon, you will lock the ticket, and it will change to a closed-eye icon, making the ticket hidden. This means the ticket will not be visible in the public registration form. You can then click "Send Invitation" to compose the message and enter the desired email addresses if you wish to invite specific participants to this ticket. You will see the following window:
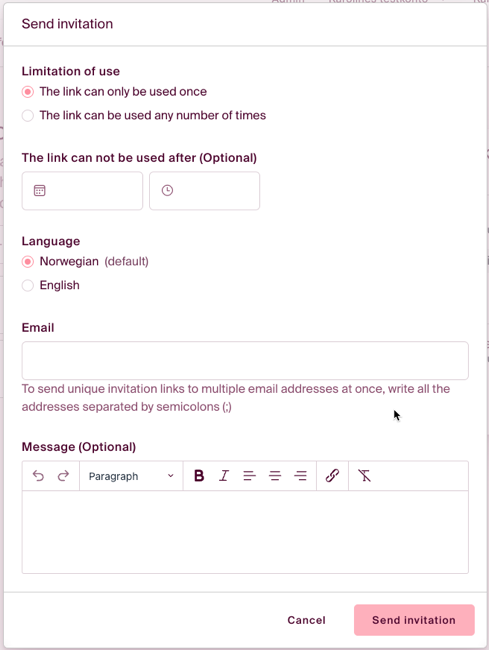
Note: Participants who receive this invitation will still be able to see other tickets you have made public. This is because many individuals may make multiple purchases (e.g., for colleagues) in the same order. If you want to obtain the link to this registration, enable "The link can be used any number of times" and send it to yourself. Use the URL in the window to further share the link.
Next step in the setup: FORM BUILDER.