Track ticket sales with Google Analytics and Meta Pixel!
If you are already using Google Analytics or Meta Pixel (formerly Facebook Pixel) on your website, Checkin can send tracking events to your existing installation.
Note! To use these tools, it is necessary to integrate the registration form/ticket sales into your website using the embed code.
In this section, you will find...
- How to add the embed code to your website
- Set up your Google Analytics with a Google Tag
- Set up events using Google Tag Manager
- Set up Meta Pixel (formerly Facebook Pixel)
How to add the embed code to your website
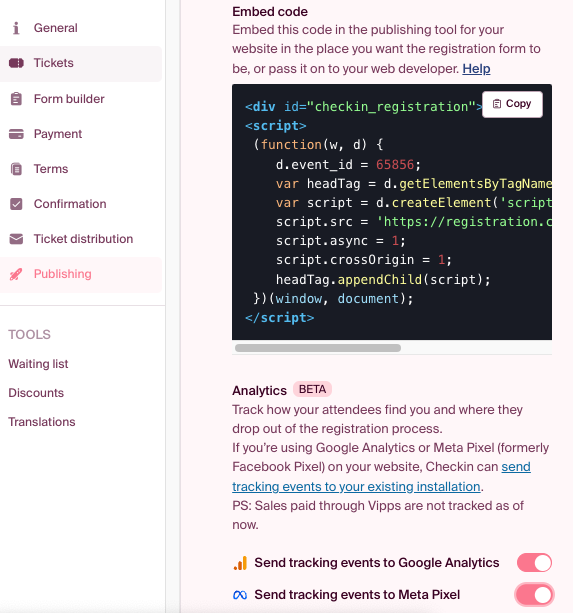
Go to the event setup and open the "Publishing" step.
Here, you can enable "Embed on your website." When you do this, you will see that you have access to a code snippet that you or your web developer can copy and paste into your website to integrate the registration form to your own website.
This embed code is unique to this event. It contains a specific event ID, allowing you to use this code to place the registration form on your website and track ticket sales for this event. If you have multiple events happening simultaneously, it is essential to add the correct code to the right page each time.
This way, you can use Google Analytics for all your events.
It is crucial to paste this code into the HTML or CMS editor of your website where you want your registration form to be visible. And remember to republish the website.
We recommend contacting your website provider if you don't know where to place this embed code. If it's not in the right place, you may not be able to see the results of your registration form in Google Analytics.
Once your code snippet is added to your website, remember to activate:
- Send tracking events to Google Analytics, and/or
- Send tracking events to Meta Pixel If you want to use Meta Pixels, you can read here about how to add your Meta Pixel to your website.
In the following sections, you will learn how to:
- Set up Google Analytics with Google Tag
- Set up events using Google Tag Manager
- Set up Meta Pixel (formerly Facebook Pixel)
How to set up Google Analytics with Google Tag
Who should use Google Tag?
Google Tag is generally used when not using Google Tag Manager.
It is faster and takes less time to use Google Tag compared to Google Tag Manager.
Where do I find my Google Tag?
Here, you can watch a video showing where to find your Google tag.
Where to find your Google tag step-by-step:
- To find your Google Tag, log in to Google Analytics and open the Admin module.
- Choose Data Streams from the menu. You will now see an overview of all your data streams. Most likely, you have only one. Click on it.
- In the Web stream details overview, you will see both events and Google tag (at the bottom). Scroll down and go to View tag instructions.
- In Installation instructions, you can choose between Install with a website builder or you can choose to install manually.
How to add your GTAG to your website
When you click on Install manually, you will see your Google tag for Google Analytics. You can copy and paste this code on every page of your website where you want to use your Google tag. It is essential to paste this code directly behind the <HEAD> element.
(If you don't know where to do this, we recommend contacting your website provider)
After doing this, you can go to Google Analytics to find your Google Tag.
You can now go back to Google Analytics.
How can I test my Google Tag?
Go back to Admin, and select DebugView.
Here, you will be able to see all events that occur on your website as you test. You can also open Reports, Engagement, Events to see what your customers have done on your website and on your registration form. It takes about 24 to 48 hours for what happened on your website to appear in Google Analytics reports.
The Events overview shows you how many page views you have had, and additionally, you can see exactly how many people complete the various steps in your registration form. This way, you can easily see where most people drop out of the registration form.
How to set up Google Analytics with Google Tag Manager
To use Google Tag Manager, you need a Google Tag Manager account. In this instruction, we assume that you have already set it up.
We recommend you to make sure that you have already added the JavaScript code to your event on your website before you start setting up new tags.
Here is a demonstration video showing how you can set up a new Google Tag in Google Tag Manager.
How to install your Tag Manager container
Open your Google Tag Manager and click Workspace.
At the top of your browser, you will find your container ID, which is formatted as "GTM-XXXXXX". Click on your container ID to open the Install Tag Manager box. Copy and paste the code snippets shown in your Install Tag Manager box onto your website. Place the <script> code snippet in the <head> tag of your website's HTML output. As close as possible to the first <head> tag, but below your dataLayer declarations. Place your <noscript> code snippet directly after your <body> tag in your HTML output.
How to create a new tag
Follow these steps to create a new tag:
- Log in to Google Tag Manager and open the Workspace tab.
- Click on "add a new tag".
- Give your tag a name, e.g., GA4 tracking, and then click on Tag Configuration.
- Choose the tag type you want to use. We recommend using Google Analytics: GA4 Configuration.
- Now you can add your Measurement ID. You can find this in your Google Analytics. Open your GA page and go to Admin. Choose Data Streams and select the data stream you want to use. (Most likely, you only have one data stream here). When you click on your data stream, you will go to stream details. Here you will find your measurement ID in the top right corner of the screen. Copy it.
- Go back to your Google Tag Manager and paste your ID.
- Now we need to set up a trigger for your tag. Click on Triggering.
- Here, you can choose All pages.
- You can add exceptions if you want.
- Click Save to save your tag.
For more information on setting up a new tag, you can click here.
We have now set up a tag. The next step is to test if it works before publishing your website.
How to test and publish your tags
You will see all tags you have added in the Workspace changes overview. And in the top right corner, you will see that your tags have not been published on your website yet.
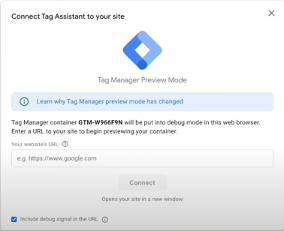
To test your tags, click on Preview.
A new browser will open for Google Tag Assistant. Here, you can add the URL you used to add your JavaScript code. Click Connect to test your URL.
A new browser will open, displaying your website. You will see that Tag Assistant pops up and is connected. Now you can go to your registration form and fill it out to see what is being tracked. After filling out your registration form, you can go back to your Tag Assistant. Here, you will now see everything you have done on the website. On the left side, you will see all the pages that were opened while using preview mode. In addition, you can see all triggers that were active on your website. When you click on a tag that was activated, you can take a closer look at all the details that have been recorded and the information your customer has filled in your registration form.
How to Publish Your Tags from Google Tag Manager:
To publish your tag(s), you can click on "Submit." Here, you will be asked to enter a version name and a description. Once you are satisfied, you can click "Publish." It is possible to undo changes you have made, if necessary. When all changes are completed, you will see a summary of the changes you have made.
How to Set Up Custom Events with Google Tag Manager:
When you want to set up a custom event in Google Tag Manager, you need to set up a GA4 event tag and then set up a trigger that describes when you want to send this event.
Setting up a GA4 Event Tag:
Here, we explain how to set up a new custom event.
- In Google Tag Manager, click on "tags," and then on "new."
- Give your tag a name, e.g., GA4 Event – Purchase completed.
- Choose Google Analytics: GA4 Event.
- In Configuration Tag, select your GA4 configuration tag.
- In Event name, add the name you want to give your event. You are now creating a new custom event, and the name you choose will appear in your GA4 reports.
Setting Up a Trigger:
Here, we explain how to set up a new trigger to send your new event to GA4 when someone uses your registration form.
- Click on Triggering in your GA4 Event tag.
- Click + in the top right corner.
- Add the name of your new trigger, e.g., Trigger – Purchase completed.
- Click on Trigger Configuration in your trigger.
- Choose "All Elements."
- Click "Some Clicks." Then you can choose when this trigger should activate. Here, you can, for example, choose "Click text contains." Make sure to add the text or field you want to track on your registration form.
- It is also possible to choose "Page view" as a trigger. Then choose "Page View Trigger" instead.
- Save the changes you have made.
How to Set Up Specific Triggers:
Google Tag Manager has a large number of trigger templates that you can use. To track how your participants use your registration form, we recommend using Page view triggers, Click triggers, or customer event triggers.
Setting Up Page View Triggers:
- Click Triggers > New.
- Google recommends adding specific conditions when expecting a click on your registration form to improve results. And we expect that because participants and your customers make different choices by clicking on, for example, ticket type, payment method, etc.
- Under "This trigger fires on," choose: Some events. Click "Trigger configuration" and choose Page view Trigger.
- Under "Fire this trigger when an Event occurs and all of these conditions are true," add a filter so that this trigger is only used on the website where you have placed your registration form.
Setting Up Click Triggers:
- Click Triggers > New.
- Click "Trigger configuration" and choose Click trigger.
-
"All elements": If you choose all elements, you track clicks on all elements on your website (Links, images, CTAs).
-
"Just links": If you choose Just links, you track only HTML links.
- Google recommends adding specific conditions when expecting a click on your registration form to improve results. And we expect that because participants and your customers make different choices by clicking on, for example, ticket type, payment method, etc.
- Under "This trigger fires on," choose: Some events.
- Under "Fire this trigger when an Event occurs and all of these conditions are true," add a filter so that this trigger is only used on the website where you have placed your registration form.
- Click "URL contains /path/to/promo."
- Create your trigger and publish your container.
Preview of Your Changes:
Before publishing, make sure to click on Preview to see if all data is being tracked when you activate the trigger you have chosen. When everything is in order and works as intended, you can publish your new event.
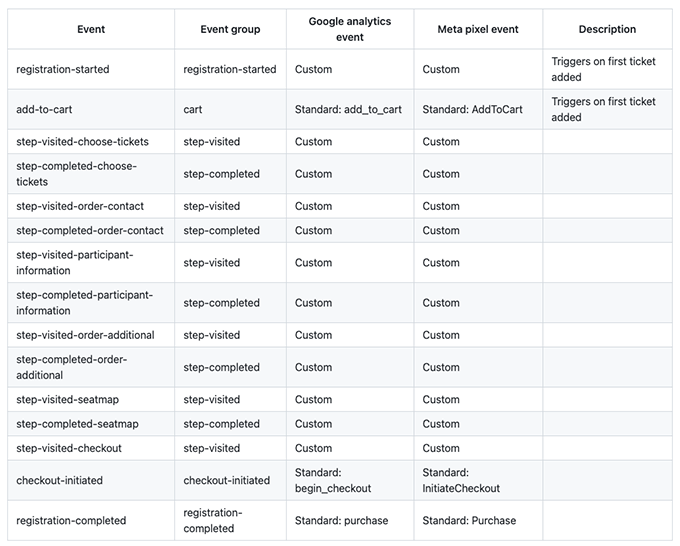
Overview of All Events:
Here you will find an overview of all events that we at Checkin have set up in our system. This table also shows which event you can use in both Google Analytics and Meta Pixel. For custom events shown, you need to follow the steps described above to set them up as an event.
Setting Up Meta Pixels for Checkin (2022):
If you want to track where your customers drop out of the registration process, you can use Meta Pixels. In this How-to guide, we explain how to set up Meta Pixel to track registrations on your website.
Note: To use Meta Pixels, you need a Meta ad account. In this explanation, we assume that you have already set up your Meta ad account.
How to Set Up Meta Pixel:
To set up your Meta pixel, you can follow these steps:
- Go to Meta and open your Meta ad account. (It is not possible to delete pixels.)
- Then you can open Business Settings. You must first set up a pixel on your account.
- Click and open the Data Sources menu and select Pixels.
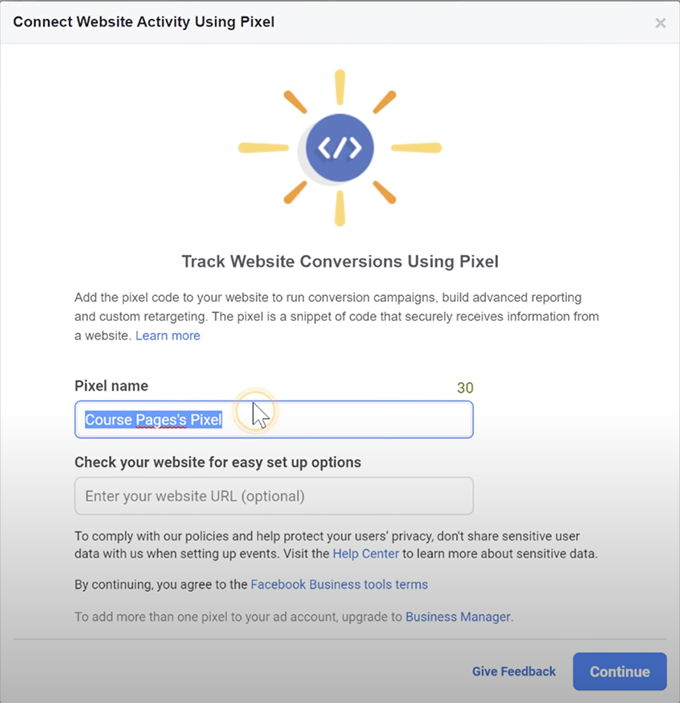
- Then you can click on Add. Choose a name for your Pixel and click Continue to save this pixel.
- You can now close the screen, as we continue to set up your pixel in another place in your Meta ad account.
You will now see your pixel and the tabs available to you. You will see People, Partners, and Connected Assets. - The next step is to add yourself as a person for this pixel. So you can now click Add people.
- Click on your name and any colleagues, and give yourselves full access to edit this pixel by activating Manage Pixel.
- Click Assign to save and Done to close the screen.
- It is important to add Assets so you can add this pixel to your ad account. Click Add Asset, check your ad account, and click Add and then Done.
Now your pixel is ready to be added to your website.
You can now choose to add your pixel manually or using a partner integration.
On this website, Meta explains how to add your Meta Pixel to your website.
Once you have added your Meta Pixel, you can set up events to track the conversions that are important to you.
How to Test My Meta Pixel:
When you have finished setting up your Meta Pixel, it is important to test if everything works as you want.
Here is a detailed checklist that you can follow to test if your Meta pixel works or not.