What do the different access types mean?
How to give access to a new user in the system?
How to give access to parts of the system?
What do the different access types mean?
Administrator: Access to all functions and editing permission.
Power user: Same access as the administrator, with the exception that they cannot add more users or delete/cancel an event.
Write access: Access to view the entire event and make changes to it. They do not have the permission to delete/cancel an event or access the dropdown menu with Account Settings.
Read access: Provides access to the system but the user can't make any changes. They do not have access to the event setup and they can't make changes in orders, or have access to the CRM.
Deny access: This is used when you want someone to have access to the entire system except for one part of it. For example, if you have multiple events and want a user to see all of them except for one, you can set "Deny access" for that specific event.
Note: If you want someone to lose the access you have given them, we recommend setting a delete at date instead of using "Deny access."
How to give access to a new user in the system
For the entire system:
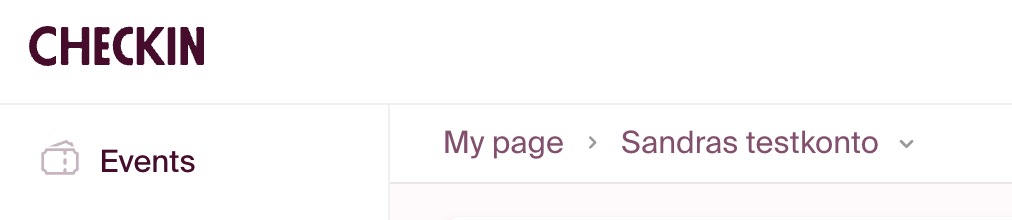
1. Click on the company name at the top of the page.
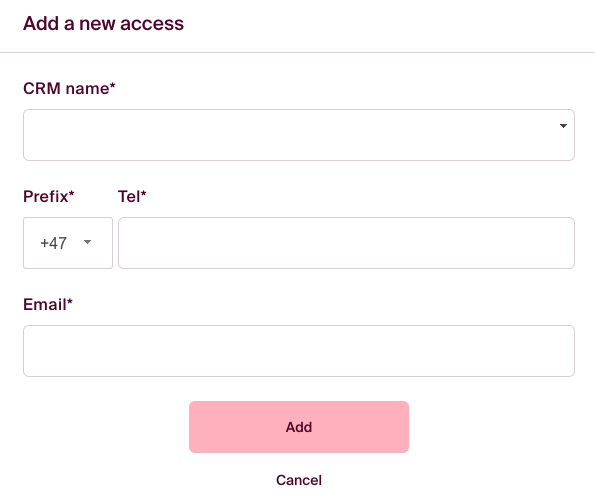
2. Click on "User Management."
3. Click on the "Add+" button.
4. Enter the contact information for the user you want to add and click "Add."
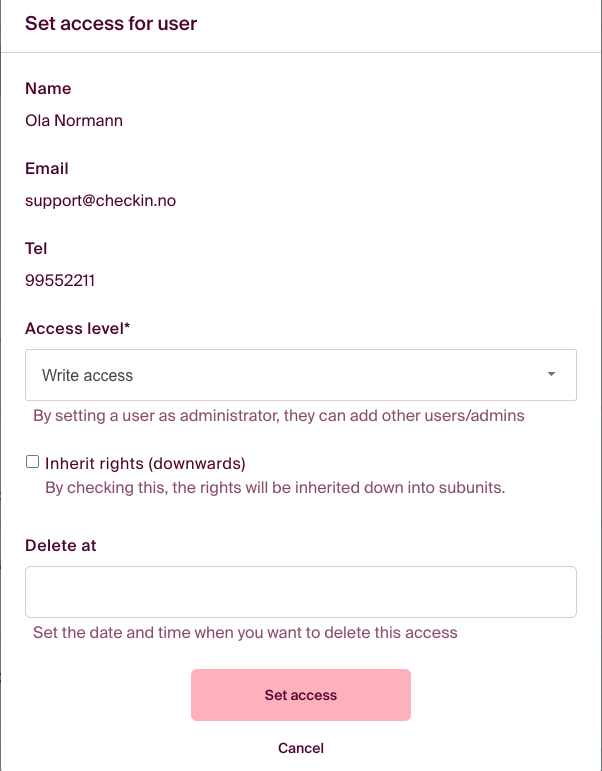
5. Choose the access level and click 'Set Access':
You can check the box "inherit rights (downwards)" if the user needs access to subunits.
The new user will receive an SMS with the password for the system. This does not apply if they already have a user in the system. In that case, the newly added customer account will be added to the existing user, and they will access it with their existing password.
When a user has access to multiple accounts, they can witch between the them by clicking the company name in the top menu, next to "my page" - then a dropdown menu will show the available accounts.
Setting access to parts of the system:
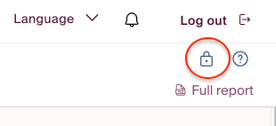
For example: If you want a user to only have access to events and not Economy/CRM/Integrations, click the small padlock icon at the top right of the Events page.
Then click on the "Add+" button in the pop-up window and follow the same steps as explained above.
The same padlock icon is available in multiple places in the system. If you want them to only have access to Economy, use the padlock icon located within the Economy section. If you want them to have access to only one event, use the padlock icon found when you are inside that specific event. This also applies if they only need access to the scanner for check-in purposes.